Pages

Thursday, November 3, 2011

Arroz Verde - Green Rice

Hola amigos! How are you? I hope you've been enjoying my recipes as much as I've enjoyed making, tasting and sharing them with all of you! Today I bring another recipe, a very VERY easy one but the fact that is easy doesn't take anything away from its delicious flavor! Today I am sharing "Arroz Verde" (green rice) and it doesn't mean that the grain itself is green this rice is cooked in a sauce that makes it look green in the end.

We, Mexicans, eat a lot, A LOT of rice, I think only Asian people eat more rice than we do, we often call rice "sopa de arroz" (soup of rice or rice soup) we don't mean by this that it is soupy it's just the way we call it, any noodle or rice we call "sopa" (soup) even spaghetti we call "sopa" why? now I am wondering the same thing!

Anyway... Here is my recipe to make "Green Rice (with Vegetables)"

Note: Even when the rice uses poblano peppers it is not really hot or spicy because we remove all the seeds/veins of the peppers it has just a very mild kick to it. My 3 yr. old enjoys this rice so I assure you it is not very hot.

Arroz Verde (con Verduras)
Yields: 8-10 Servings
 Ingredients:
2 cups of white or jasmine rice* (I use and prefer jasmine)
6 tbsp. butter
2 Poblano peppers (stem, seeds and veins removed) -cut in quarters- (I use 1 poblano pepper per cup of rice)
1/4 white onion (cut into smaller wedges, it will go into the blender)
1 clove of garlic
1/2 cube of chicken bouillion (or use 2 cups of chicken stock instead of 2 of the cups of water)
*4 cups of hot water if you are using white rice or 3 1/2 cups if you are using jasmine like me.
1/2 cup of frozen mixed vegetables (optional)
Salt to taste (about 1.5 teaspoons)


Directions:
  •  First make your sauce. In the jar of your blender add the poblano peppers, white onion, clove of garlic, and about 1/2 the amount of water, blend until it's all completely mixed and there are no big pieces of poblano pepper, then add the chicken bouillion to it and blend for another minute. Set aside. (The poblano peppers make a lot of "foam" then they are blended, don't worry, that's normal).


  • In a big saucepan and at medium heat melt your butter. Once it has melted add the 2 cups of rice and start stirring preferably using a wooden spoon. Stir constantly until the rice has turned into a more opaque color and not as white anymore but don't let it really brown (about 4 mins.)

  • Add your poblano pepper sauce to your rice (carefully because it might "jump" a lot from the heat of the pan) stir once and then add the remaining water, your frozen vegetables if you are using them and season with salt (stir JUST once again). 

  • Once it starts boiling reduce the heat to low. Cover with a lid just leaving a tiny crack open (do not uncover often or stir at all again). let it cook until all the liquid is all gone (about 18 mins). Cover completely, remove from the heat and let it sit for about 5 mins. Fluff with a fork and serve.


I hope you like this simple and delicious recipe!If you do please do not forget to leave a comment, we, cooks, stay encouraged by the comments of people who enjoy our food!

Provecho!

Paloma.

Monday, October 31, 2011

Salsa verde! Picante! - Green Salsa! Hot!

Good day everybody! I thought it was about time for me to share another recipe! So, here I am! Sharing a very easy recipe to make a delicious (and authentic) Salsa Verde! This salsa is made with Green Tomatillos which are a staple in Mexican cuisine! You can find them pretty much in any Supermarket, they might look a little weird to you if you have never bought them before, they are usually covered by a very very thin yellow/brown/grayish layer of skin (it can be easily removed, it's almost like a layer of thin paper) so don't worry about that layer, it doesn't mean they are "bad" it just means that you discard that skin and use the tomatillo inside. The flavor of tomatillos is very distinct so you can't just use any kind of "tomato" as a substitute, if the recipe calls for tomatillos you have to use them. They are not expensive and they are really good.

Mexican Green Tomatillos
Salsa verde Mexicana
(Makes about 2 cups)

Ingredients:
  • 5 or 6 Tomatillos verdes (green tomatillos) (it depends on their size if they are too little you need more, this is already a small kind of 'tomato', about the size of a roma tomato -just rounder-)
  • 3 chiles serranos (serrano peppers) -stems removed-
  • 1 clove of garlic
  • salt to taste (I use 1 1/4 teaspoons)
  • 3 tbsp. chopped cilantro (fresh... you cannot use dry cilantro at all in this recipe, if you can't get or don't have cilantro is better to just not use anything else instead your salsa will still be good, cilantro just takes it to a whole new level of flavor!)

Directions:
- Place the tomatillos and peppers with about 2 quarts of water in a saucepan over medium heat until they boil and the tomatillos/chiles cook until the tomatillos change color and seem to start to peel (about 15 mins). Remove from the heat.
 
 - In a blender add the cooked tomatillos,peppers (without any additional liquid where they were cooked, the tomatillos absorbed liquid anyway while cooking and that will be enough for the salsa), garlic and salt and blend until they are completely mixed and the salsa looks like this:

- Then add your chopped cilantro and blend for about 5 seconds just so it incorporates to the salsa and transfer to a container where it can be stored. Let it cool until it's room temperature and enjoy! It might "smell" like it is a very hot/spicy salsa but once it's completely cooled down you will be able to taste it and see that it is not that hot at all! You can store it in the refrigerator up to 5 days! Trust me! If you have tortilla chips or "Tostitos" this salsa will not see a second day!


I hope you like it! Remember... if you try this recipe and enjoy it... please leave a comment, a cook is always encouraged to keep cooking by the praises to her/his food!

Paloma.

Friday, October 21, 2011

Albondigas Rellenas de Huevo - Meatballs stuffed with hard-boiled egg

Hello everyone! Here I am with a new (not so new if you are a Mexican) Mexican recipe and this time it's "meatballs" who doesn't like meatballs? They are so versatile! They can be "simple" or "fancy" and you can use pretty much any meat to make them! (turkey, beef, veal, lamb, pork... ANYTHING). This recipe is not uncommon in Mexico and it makes GREAT meatballs that go perfect next to white (buttered, YUM!) rice. It might sound a little weird to you (if you have never had them before) but these meatballs are stuffed with hard-boiled egg... Trust me... you have to try them! So... here is the recipe:

Albondigas rellenas de huevo / Meatballs stuffed hard-boiled egg

Yields: 8 Meatballs (4 servings)

Ingredients:

1 lb. ground beef
1 chipotle pepper (from a can of chipotle peppers in adobo sauce)
2 cloves of garlic
1/4 white onion
6 roma tomatoes (or about 4 of the whole red tomatoes) - cut in quarters or big chunks -
3 hard-boiled eggs cut in quarters (you will probably only need 2 because we are making about 8 meatballs but cook 3 eggs just in case)
1/4 cup of white rice
1 cube of chicken bouillion
salt and pepper to taste (about 2 tsp. salt and 1 tsp. of black pepper... adjust to your taste)
about 1.5 tbsp. vegetable oil (or a little more if necessary)

Directions:
- In a middle sauce pan pour some water (fill it about half-way) and when the water starts boiling throw the 1/4 cup of white rice and let it boil for only 5 minutes, remove from the heat, drain the rice immediately and set aside (let it cool for about 5 minutes)

- Mix the ground beef with the rice, season with some salt and black pepper and mix it all well with your hands.
- With the meat start making "patties" (like hamburger patties) and wrapping the egg quarters with those patties (one quarter per each of the patties) Making sure the egg is completely wrapped by the mix of meat/rice. Do this with all the meat/rice mixture. You should have about 8 meatballs. Set aside.

- Put your tomatoes, garlic, chipotle pepper and about 1 cup of water in the blender. Blend it all until it makes a sauce (as smooth as possible)
- In an extended non-stick pan using medium-low heat add the oil and fry your 1/4 onion there (you can slice the onion if you want, it doesn't matter much but the onion will be removed) While the onion is frying and the oil is hot add your meatballs carefully so they don't open or fall apart, if you use medium or medium-high heat it might cause them to break so just be patient and seal your meatballs on all sides.

-Once they are browned on all sides (about 9-10 minutes) remove the oil and the oil excess. Add your sauce and chicken bouillion (you can add some salt at this point if necessary but wait until the sauce has been simmering for about 5 minutes to taste and adjust) once you add the sauce you can also add chopped potatoes if you want just to add something else, but I left it like that. Bring it all to a boil, cover, turn the heat down to low and let it simmer for about 35 minutes and serve.


I hope you like this recipe! If you do please let me know! Comments are always a great encouragement to keep cooking/sharing.

Paloma.

Friday, October 14, 2011

Salpicon ... Mimi Style!

Today's recipe is not mine.... My friend Mimi! She is a wonderful Mexican cook! And I love her wittiness and style! I am so happy I found her blog! If you know how to speak Spanish I am sure you will love it too: Me gusta cocinar pero odio lavar los platos (I love cooking but I hate washing the dishes) and she actually repeatedly refers to herself as "The lazy cook" ... So anyway.... Don't get discouraged if you don't speak Spanish! I am here to translate! And that's exactly what I am doing today... I am bringing one of her recipes to all of you! in English!

Today it will be "Salpicon" and it's delicious! as I've already explained (probably with all my recipes) each Mexican dish has its original foundation and flavors... BUT EVERY SINGLE FAMILY has their own version of it! Recipes in Mexico are usually not very "precise" they are transmitted from the older generations to the younger ones based on experience and it's all about your senses... When your "abuelita" or "mamá" (granny or mom) tell you how to prepare a dish they usually use phrases like "When it looks like this, when it tastes like this, when it smells like this and even when it sounds like this or that" so... Mexican cooking is all about feeling and experiencing through your very own palate, hands, eyes and ears! not so much about 1/2 tsp. of this or that....

Of course, we, modern cooks and bloggers are trying to put it all in a way where most people would be able to reproduce it... So ... here goes Mimi's version of Salpicon! I hope you enjoy it:

Ingredients:
  • 1/2 pound skirt steak (cooked until tender in water with some salt and a big piece of onion and then thinly shred it with the help of a fork)
  • 1 carrot thinly sliced (julienne)
  • 1 potato cut into julienne
  • 1 serrano pepper (roasted directly over the fire on your top stove, on the grill or on a flat pan if you don't have "Fire on your stove" and it's electric) make sure the pepper gets slightly charred - then thinly slice it -
  • 1/2 white onion (sliced in circles)
  • a little bit of vinegar (here we go, you see? It all depends on your taste, it's just for dressing)
  • olive oil (once again, it's for dressing, so just eye ball it!)
  • dried oregano (remember it has a strong flavor so it won't be more than 1 tsp)
  • Salt and pepper (to taste)
  • The ingredients above MAKE the salpicon but to eat it you will also need:
  • Thinly sliced lettuce
  • tostadas
  • 1 avocado
Directions:
Mix the shredded meat, carrots, potatoes, serrano (green) pepper and the onion, mix the olive oil and vinegar separately (it would be about 1/3 cup) and add it to the meat and the other ingredients, season with a little bit of oregano, salt and black pepper to taste.

Then place it all over the tostadas and top it with lettuce and avocado (season again with a little bit of salt)

Enjoy!!!

Thank you for sharing this recipe with all of us Mimi!!!

Paloma.

Wednesday, October 5, 2011

Taquitos de Tortilla Roja - "Red Tortilla Tacos"

I love Red Tortillas! have you ever tried them? They are not made with "Red Corn" or anything like that... they do have some "colorant" in them to make them look red... but what I love the most about them is their very distinctive flavor... They are seasoned with different condiments that make these tortillas PERFECT for certain type of Mexican tacos.

One very easy way to use them is to basically warm them up and then pass them through some hot vegetable oil, after this you can just fill them with a mix of queso fresco and chopped white onions, there is no specific recipe on "how much queso fresco and onions you need, because it varies, some people like more or less onions so it basically depends on your very personal taste. Queso fresco can be found in many stores, just make sure it says "QUESO FRESCO" and not Mexican cheese, queso fresco is not the "melting kind of cheese" but it's a more crumbly one.
Always garnish your "Red Tortilla Tacos" with fresh raw cabbage... Trust me... The flavor of cabbage with the red tortilla tacos is SOOO GOOD! Much better than using lettuce with them.


You can also fill these tortillas with shredded skirt steak and or even some mashed potatoes seasoned with dried chile cascabel and chile ancho (The recipe to use these chilies is coming!)

So go visit a Hispanic supermarket and try to find RED TORTILLAS! Trust me... You'll love them!

Paloma

Monday, September 26, 2011

"Flautas" - "Taquitos de Pollo"

Hi everybody! Here I am with another recipe to share with you! This is a very simple (and really really good!) recipe.

It's basically "chicken taquitos" but what matters is that not only it is simple to make but regardless (or because of) its simplicity it is just delicious!

I have already explained that tacos (in Mexico) do not have a "specific recipe" we call taco ANY FOOD that goes in a tortilla (flour or corn) -we just specify if it's flour or corn tortilla but they are still both tacos! we do not use HARD SHELLS in Mexico, those "pre-folded" kind of nacho shells are an American invention (not saying  is a bad invention) just not an Authentic one. So if you have tortillas in your refrigerator and even put just "onions" in it... that is already a "taco" just a "taco de cebolla" (onion taco) and I am not sure it would become very popular... but it complies with the requirements to be a taco... because it is food that goes in a tortilla... so... anyway... "Taquitos de Pollo" (also known as flautas) are VERY VERY popular in Mexico and as any other dish in Mexico there are many versions of it... so here is mine:

Makes 12 taquitos (this is usually enough for 2-3 people, one person eats 4 to 6 of these tacos)
Ingredients:
- 2 (or 3 if they are too small) cooked (boiled) and shredded chicken breasts (boil them in enough water to cover them, add salt to the water about 3 tsp. and 1/2 white onion) discard the onion and just use the meat.
- 12 corn tortillas (buy good ones, "La Banderita" is a good option, "Tia Rosa Corn Tortillas" are ok too, the best I've found are the "Fiesta" Tortillas made in their tortilleria but I don't know if there is one of those stores by you)
- 1/2 white onion
- 1/3 iceberg lettuce or 1 romaine heart of lettuce (thinly sliced)
- 1 whole red tomato (or 2 roma tomatoes)
- Crema Mexicana (Mexican Table Cream)
- Salt to taste
- Oil to fry (about 1/2 cup)

Directions:
- Warm up the tortillas (if using the microwave warm them up using paper towel in between each tortilla) and just for about 25 seconds. If using the stove just use a flat pan to warm them up (both sides) and until they are warm all the way through. This makes them easier to handle/bend/roll (even if they cool off a little while they are being filled)

- Fill them with some of the chicken and roll them tightly (place them all on a plate firmly arranged next to each other so they remain rolled)

- Warm up a non stick pan and add part of the oil (about 12 of it) until it is VERY HOT (also add a little bit of salt the oil), place the taquitos there (one by one, carefully with the seam down) once they fry on one side they will easily stay rolled because they harden. You can place as many taquitos as you want at a time, because the fact that they are close to each other helps them keep their shape but if you want to do two or three at a time is ok, just make sure they fry all the way around (turn them while they fry so they don't burn and cook evenly) They should be hard and crunchy... they should keep their shape if held from one side only. (use more of the oil if necessary, they should be fried in the oil all the way around) Look at the pics:


Place them on a plate lined with paper towel to get rid of any excess of the oil.

Plate them (4-6 on a plate) and garnish them with the onions, lettuce and tomatoes) -in that order- add some of the table cream on top of them (and sprinkle with a pinch of salt if necessary for the garnish). These go AWESOME with sliced avocado and green salsa but I had none when I made them, so if you have a good avocado at hand go ahead and try it on these.


Provecho!

Paloma

Friday, September 23, 2011

Cactus Salad - Ensalada de Nopales

Hello everyone! I am just done enjoying some grilled chicken that hubby made! It's Friday so it always feels like "grilling" on Friday nights, don't you think? who knows... it might just be the weather!

Anyway... I thought about fixing something quick to go with the grilled chicken and I decided to make "Ensalada de Nopalitos" or Cactus Salad... Nopalitos are very common in Mexico and we eat them either grilled, boiled and in salad like I just did, seasoned with some red chilies and in tacos  or with eggs in the morning (I know it sounds weird but THEY ARE SOOO GOOD LIKE THAT) So I thought I would come here and share the "recipe" with you so you can hopefully try it too!

Remember that we, Mexicans, rarely use EXACT amounts when cooking, it's a lot about your very own taste and how you like/feel things so this is one of those recipes

Note: you can buy "Nopalitos" at any Hispanic Store in the produce area, don't buy the stalks, buy them already cleaned and cut so you don't have to deal with the thorns.. trust me it is not fun!

Cactus Salad: Serves about 4 (or 2 very hungry people like we were today!)
Ingredients:
  • 3 cups of fresh Nopalitos (cactus)
  • 1/3 white onion -whole-
  • 1/3 white onion (finely chopped)
  • 2 small red tomatoes (or 1 big) (cut in small cubes)
  • 1 avocado (cut in small cubes)
  • 1/2 cup chopped fresh cilantro
  • 1 small can of Sliced (and pickled) Jalapeño Peppers - you will use 2 tbsp. of the liquid and some slices of the jalapeño peppers finely chopped - the amount of peppers depends on how much heat you like in your food, you can even use the liquid only if you don't want the peppers -
  • 1/2 tsp. FRESH lime juice
  • Salt and black pepper to taste
  1. First boil  the nopalitos and 1/3 white onion (whole) in about 6 cups of water until the nopalitos are cooked through (they'll change to a more opaque color) -cook for about 15 mins- Then Rinse and drain about 4 times in cold water (to remove the slimy liquid from them, it won't completely go away but it'll be fine) - Place them on paper towel to remove the excess of liquid. (discard the cooked onion)
  2. In a salad container mix the rest of the ingredients  (chopped onion, tomatoes, jalapeños, lime juice, avocado and cilantro), add the cooked nopalitos to the mix, season with salt and pepper and toss until it's all combined!
Enjoy with grilled meat/chicken and hot corn tortillas!


Provecho!

Paloma.

Tuesday, September 20, 2011

Cochinita Pibil!


Hello everybody! As I promised... Today I am going to post the recipe to make the wonderfully flavorful, tasty almost heavenly "Cochinita Pibil" but first let me tell you a little bit about it:

"Cochinita Pibil" is probably the most famous dish from Yucatan, State in the Southeast of Mexico. This dish is originally cooked in a hole in the ground, people would basically make a kind of "Adobo" to season the meat (pork) then wrap it in Banana leaves and place it all in a hole previously dug for this purpose on hot stones (rocks that have been previously placed in fire). Pibil is a word in "MAYA" and it actually means "underground" This method of cooking is used in many Mexican recipes and it has pre-hispanic origins.

"Pasta de Achiote" is the main ingredient to "season" the "cochinita". There is a tree that is native of Central America and Mexico. It produces a fruit that kind of looks like a "big capsule" and when it ripens it opens and "reveals" its red seeds (annatto seeds) which are mixed with spices to make the "dark orange" paste which is used to season many extraordinary dishes. Interestingly this condiment wasn't just valued due to its flavor but it seems that "The Mayas" also used it as insect repellent and to color fabrics and some other items. It was also used as body and facial paint for some of their religious traditions and rituals. Annatto seeds are also known for their therapeutic, astringent, antibacterial, anti-inflammatory and healing by the formation of scar tissue.

There are some traditional steps to follow to make cochinita pibil, things that basically make it authentic. For example, to make a real cochinita pibil you need banana leaves and orange juice plus some other spices, if you find a recipe that does not call for banana leaves, orange juice or achiote then it's definitely not a good recipe. 

So, I won't make you wait any longer and here is the recipe to make a wonderful (and very easy) Cochinita Pibil:

Serves 6-8 people or MANY tacos 

Ingredients:
  • 2.5 pounds of pork meat (it can be butt, leg or picnic roast -the one you would use to make carnitas... that's the one I used)
  • 3/4 of a bar of achiote paste (the bar should be about 4 oz. so you would use 3 of those 4) (You can find this in the hispanic or ethnic foods isle) -it might look like this (there are different brands though):
  •  Black pepper (about 1 tsp.)
  • Salt (to taste) I used about 2 tsp.
  • 3 Garlic cloves
  • 1/2 tsp. dried oregano
  • 3 tbsp. apple cider vinegar
  • 2/3 cup of water
  • 1/3 cup of vegetable oil (or PORK Lard if you can get it) - this is only needed if the cut of pork you use is not very fatty.
  • 1 cube of chicken bouillion 
  • The juice of 2 limes
  • Juice of 1/2 an orange
  • 3 Banana leaves (you can get this at any hispanic supermarket, there is at least one in your city, I am sure! and they sell these in the produce area)

For the Garnish:
  • 2 red onions (thinly sliced)
  • 4 cups of boiling water
  • 2 tbsp. vinegar
  • dried oregano flakes (2 tsp.)
  • salt to taste
* You also need to have soft corn tortillas to go with it!

    Directions:
    1. Cut the meat in squares (about 2") 

    2. Blend the rest of the ingredients (except for the garnish ones) until you have a pretty smooth "sauce" and use it to cover the meat, cover it all with saran wrap and refrigerate for at least 2 hours so all the flavor of the sauce really impregnates the meat.

    3. Minutes before getting the meat out of the fridge, rinse the banana leaves in warm water, pat them dry and place them  in a cold oven and start it at 400 degrees, remove the leaves from the oven after about 5 minutes (or until you find that they are easier to handle and bend without tearing). - Turn down the temperature to 325F, that's the temperature you will use to bake your meat.

    4. Use the leaves to line a baking dish where the meat would easily fit (without having too much space because you'll want to make a firm bundle with the meat in the banana leaves) I used an 8x8 baking dish.

    5. Get the meat out of the fridge and place it along with the sauce in the middle of your baking dish previously lined with the banana leaves -don't worry if some of the sauce leaves the "bundle" through any crack the leaves might have, try to avoid it but don't worry if it happens- (Make sure you leave the banana leaves big enough to be outside of the edges of the dish because you will still use it all to cover your meat). "Close your bundle" by folding the edges of the banana leaves towards the meat (you can use an additional leaf of banana on top if needed to make sure it's all wrapped in banana leaves and then cover it tightly with aluminum foil.


    6. Bake for about 3 hours in the preheated oven after this time you can get it out of the oven, uncover VERY CAREFULLY because it's all HOT AND STEAMING in there. You should be able to shred it EXTREMELY easily with a fork. If it's not SUPER tender and "almost shredding on its own" you can cover it again and put it back in the oven for an additional hour.


    7. Once its ready you can uncover, finish shredding it and mix it with all the juices that are left.
      To make the garnish:
      This is VERY EASY and you can do it a few minutes before serving it all:

      Have a pot of boiling water (the 4 cups) on your stove and throw in there the sliced RED onions, leave it in the water for about 15 seconds (while gently stirring) and drain. Dress the onions with the vinegar, oregano and salt.

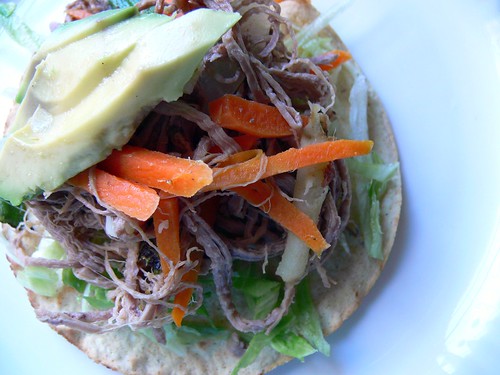
      You can enjoy this AMAZING dish in tacos (use soft corn tortillas) with the onions or with white rice (I had buttered rice) on the side.

      You HAVE to try this! Trust me! It is really good! Hubby had quite an experience while eating it last night! It was great to hear all the ooooh's and aaaah's while he was eating! It is very rewarding when you make a dish your family enjoys so much!

      Provecho!

      Paloma.

      Monday, September 19, 2011

      Mexican Ingredients and FIESTA

      This time I just want to share that I am very excited I found a store that sells most of the Mexican Ingredients I am so used to and I SOOO NEED to be able to cook my Authentic Mexican Food and share it with all of you!


      On Saturday we went to "FIESTA" Supermarket... It is a very "colorful" store... It has the whole "Mexican feeling" and... well.. I'll let my gringo, my husband, describe it more to you, because it is only through HIS EYES that I actually REALIZE how different it is from the rest of the American Supermarkets. For me, it is basically a "normal store", of course I realize it is different but I can't even explain it as clear as he does... you'll see what I am talking about so... Here is my husband to share about it:

      "When you approach the store you are met by outside vendors that sell a variety of items like posters, purses or music CDs.  Upon entering you realize you can purchase a flat screen TV, get it financed with zero credit history, get your hair cut, purchase produce, or buy jewelry in the produce department.  You can pick out your own live fish for dinner, buy cups, plates, utensils, glassware, cooking ware, have a full meal there and purchase underwear, shoes, shirts, pants or whatever you need for your person.  And if you are not sure if the clothes will fit, there are dressing rooms located in the frozen section." - JK


      Well, there you go! That's basically what "FIESTA" is!  If you think this Mexican store is diverse, Mexico is even more.  You can find new and old, big and small, traditional and modern, poor and rich all in the same street! Now I am going to share some of the ingredients I got there and I'll be talking more about them as I cook and blog about it all!
      Nopalitos (Fresh Cactus)
      For our desserts
      Chile Ancho
      Chile Cascabel
      The Flour my dad has always baked with

      Corn Tortilla (FRESH!!)
      Tortilla Roja (Red Tortillas)
      Achiote (Annato Seed Paste)
      Banana Leaves
       I hope you are as excited to try all these ingredients as I am to cook with them and introduce them to you! I hope you get to know them well and make them YOURS and part of your common ingredients in your kitchen!

      I know you were probably expecting a new recipe but don't worry... Just be a little patient... More is coming! Just today I made "Cochinita Pibil" so I'll be sharing that recipe on my next post.

      Thanks again to my wonderful husband not only for always looking for places for me to find what I, as a Mexican, need but also for getting involved with my culture and enjoying it with me!

      Un abrazo!

      Paloma.

      Friday, September 16, 2011

      Mexican Independence Day!

      Hello friends! I couldn't let this day pass without a post! Because today (and not "Cinco de Mayo") Mexico celebrates its "independence" it seems that we need to fight again to gain it all over again but that's a different topic I won't get into... so, anyway... The way we celebrate Mexican's Independence is HUGE! When hubby and I first met in person (we actually met online and started dating online) he visited Mexico for the first time and since he was there in September he could witness and experience for himself what "Mexico's Independence Day" is all about! Noise, Music, Lots of Fireworks, Passion, Screaming (We actually do most of it on Sept. 15th at 11 p.) We have our "Grito" - Our leaders/rulers/mayors/governors/President go outside the city hall/"Mexican 'White House' and re-enact the proclamation of Independence and SCREAM: VIVA MEXICO! VIVA MEXICO! VIVA MEXICO! and also mention the Heroes that fought to earn Mexico's Independence...The celebration basically lasts all month and you can see the streets decorated with "papel picado"  (colorful paper decorations) and there are bands and dancing groups every night in every city square... at least that's the way it's always been and that's what Josh got to experience when he was down there! He really loved it! And I was so happy to get to share and live that part of my culture with him. Of course one of the most important things during these celebrations is... FOOD! "Antojitos Mexicanos" are served EVERYWHERE: Sopes, tacos, tostadas, mole, menudo, pozole, aguas frescas, churros and much more is part of the menu of the "night" (do not expect to sleep that night) There are parties everywhere (schools, homes, offices, churches) everywhere and FOOD is like the "center" of it all, and we all usually get dressed in a very "old Mexican" way... I love it all! I hope if you ever visit Mexico you have the opportunity to be there in September 15-16 so you get to live it all first-hand! Trust me... Any description anybody can make of it all is nothing compared to living the REAL THING! I wish I could've celebrated last night as I should've but it was impossible... hopefully next year I'll get to have a big Mexican party and can cook many of the traditional Mexican dishes to share it all with you!
      Josh enjoying "Morning Street Tacos" in Mexico - Sept. 2006

      Josh and I celebrating Mexican's Independence Sept. 2006

      Tuesday, September 13, 2011

      Empanadas de Piña - Pineapple "Empanadas"

      Hello everybody! How are you doing? We are almost at the end of our groceries here, we usually go grocery shopping on specific days... and I actually like those few days before we go grocery shopping again because it actually helps me get "creative and inventive" in my kitchen.

      If you follow my other blog The Coffee Shop you know that the last dessert I made were those AMAZING Cheesecake Cookie Cups, those I made on Saturday (even though I posted the recipe until Monday) so they were already gone by yesterday (of course I only made 1/2 a batch) so I knew I had to start baking again to have something sweet to go with our "nightly coffee" ... I went to my pantry and I found:


      I immediately knew that would be my inspiration for my next dessert... And then I remembered my dad (an expert baker) told me once that he uses canned pineapple slices for his empanadas, he doesn't use jelly because it has too much sugar and that + the consistency of the jelly makes it all caramelize inside the empanada and in consequence you end up with a very hard piece of pastry with nothing in the middle but hard caramel in the internal walls of the empanada... So I thought: That's what I'll make!

      Then I also thought I've never actually made empanadas (even when my dad has made THOUSANDS of them) and I don't even have a recipe... I started looking online but all the Empanada recipes I found out there seemed to ask for so many ingredients! (and I was out of some of them), the reviews also made me doubt about making them or not (I didn't want to waste the only ingredients I had) and then it happened! I had the best idea I've had lately! (LOL!) I would make my empanadas with the dough I use for my apple pie! Oh! I was so excited! I thought it would work out! then I checked my pantry again... and I didn't have shortening! I usually use 6 tbsp. of butter and 6 tbsp. of shortening for my pie crust! I was very disappointed, I called my dad (in Mexico) and he told me to use just butter and the dough would be even finer... I went for it and well... These are the results:


      I am so happy that these turned out not only well... but REALLY REALLY GREAT! Hubby loves them! And they are very easy to warm-up in the microwave too!

      So here is my recipe:

      Paloma's Empanadas de Piña:

      Makes about 12-14 empanadas

      Ingredients:
      2 cups all-purpose flour
      1 teaspoon salt
      1 tablespoon sugar
      12 tablespoons butter (room temperature, softened -not melted-)
      6 to 8 tablespoons ice water (I used exactly 6)
      1 can (20 oz) of pineapple slices (drained)
      + 1 1/2 cups of sugar and 1 tbsp. of cinnamon for coating.

      Directions:

      Mix in a large bowl:
      2 cups all-purpose flour
      I teaspoon salt
      1 tablespoon sugar
      Then cut in using a dough blender (or fork) but not your hands
      12 tablespoons butter
        6 to 8 tbsp. iced water (You don't need to mix too much, just until the ingredients have incorporated and you can see a ball of DOUGH forming instead of divided pieces of it)

      Your dough should look like this when you are done mixing
      Once your dough is mixed and has formed a ball just wrap it in plastic wrap or put it in a ziploc bag getting as much air as possible out of it. Then place in refrigerator for 20 or more minutes.


       In the mean time get your drained pineapple slices and cut it in very small pieces (not so small that is like mush) but just small cubes (you will see the example in another pic below)

      Also in a container or big extended plate mix about 1 1/2 cups of sugar with 1 tbsp. of cinnamon (more or less, it depends how much you like cinnamon) and set aside (you will use this to coat your empanadas when they come right out of the oven)

      Lightly Grease two baking sheets with butter.

      Preheat your oven @375F.

      Get your dough out of the refrigerator (after the 20 mins) and make small balls (1" diameter) with them, flour a smooth surface and roll each ball out with your rolling pin until you make a kind of "small oval tortilla" (about the size of your hand) and fill it with the pieces of pineapple. (about 3 tsp more or less) just making sure that there is enough space for you to fold the empanada and "seal the edges" (to do that just press with your fingers) and then press with a fork on the edges. (This also makes them look nicer) Use your fork ONCE or TWICE (only) to make little holes on top -center- of the empanadas just to let the steam out so they don't burst while baking.


      Place your empanadas on your baking sheets and bake for 9-10 minutes, open the oven and with a spatula quickly turn your empanadas so they bake on both sides, bake for an additional 5-7 minutes. Get out of the oven and immediately transfer to your container with the sugar/cinnamon mix. (use a spoon to pour the mix all over them making sure they are all perfectly coated) shake a little bit to remove the excess and transfer to a plate or wire rack so they completely cool off (you can eat them warm, be careful because the filling is REALLY REALLY hot)


      Enjoy!!!

      Paloma.